Beginner Sewing Straight Stitching
by Mrs. Moriya Chesler
Learn how to sew straight stitching with this very easy-to-follow tutorial for beginners.
Good Posture
When you are ready to sew, sit up straight with a good posture at the sewing table. Do not slouch to avoid developing a sore neck and back. Ensure that you also have good lighting in the room, even though your sewing machine may come with a back light.
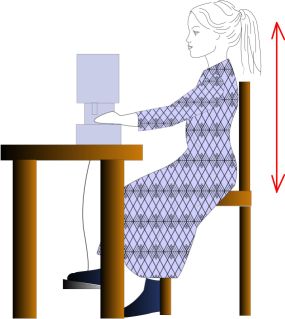
Good Posture (C) Mrs Moriya C for KosherPatterns(R)
Straight Stitching
The sewing supplies you will need to begin your first test stitching are as follows:
Pieces of solid light-colored cotton fabric
Contrasting color thread for both upper spool and bobbin
AND
Fabric markers (chalk or pen)
OR
Printer
Pre-cut 8.5-in by 11-in white cotton fabric
Sheets of Quilter’s Freezer Paper

Quilter’s Freezer Paper | Sold on Amazon
Iron your fabric if it is crinkled. Save this template below and transfer the markings onto your light-colored fabric, pre-cut as 8.5-in by 11-in.
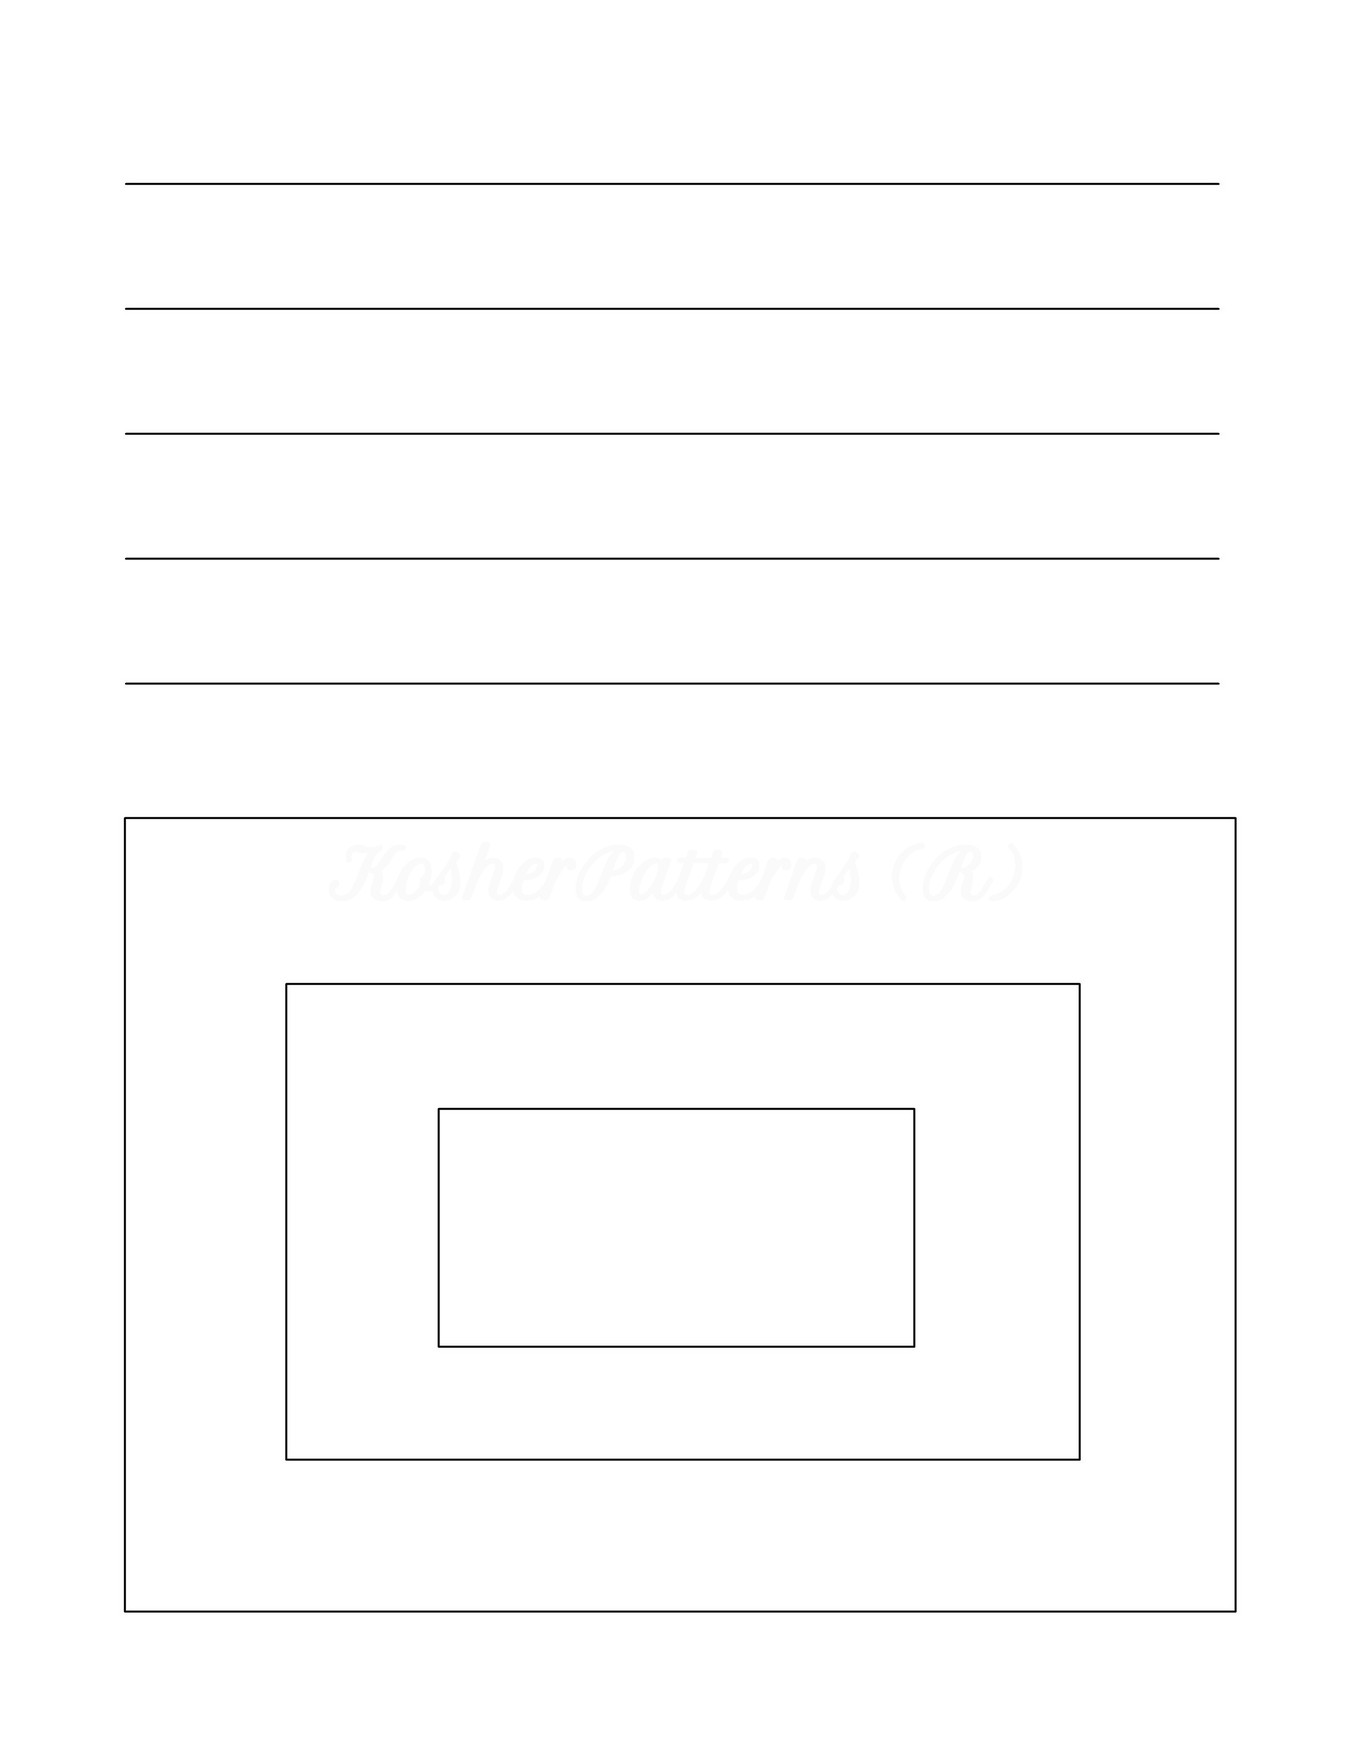
Or, if you have a freezer paper, iron it onto the back of the pre-cut fabric. When the fabric is stiff enough to be fed through your printer, print the template image to it.
Make sure your sewing machine is threaded properly.
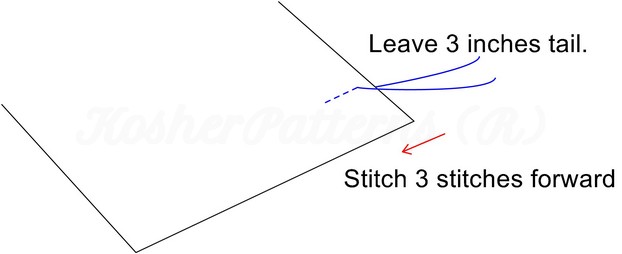
Always place the wider side of the cloth to the left of the needle. Make sure you leave a thread tail of about 3-in behind the needle before you sew. Place your needle down on the corner of the cloth where you will begin stitching the top line. If you look at the template above, it will be the top-left corner. Lower your presser foot. Set your stitch length to be 2.5, your stitch width to be 0, and your stitch type to be a straight stitch.
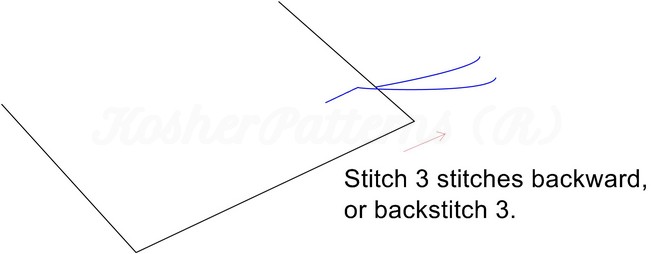
Follow these steps to start sewing. Stitch 3 stitches forward.
Straight Stitch Step 1 | Copyright Mrs Moriya C for KosherPatterns (R)
Lock the stitch by back-stitching. You do this by stitching 3 stitches backwards. Depending on your machine, you may need to press and hold the back-stitch lever while you back-stitch. Some machines only require you to press the back-stitch button once and you control when you stop the reverse movement by pressing the button again. Check your manual for how to do this.
Straight Stitch Step 2 | Copyright Mrs Moriya C for KosherPatterns (R)
Continue stitching forward until you reach the end of the template guide line.
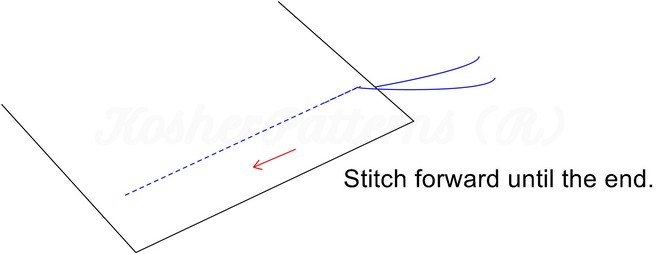
Straight Stitch Step 3 | Copyright Mrs Moriya C for KosherPatterns (R)
When you reach the end, you have to lock your stitch again. Back-stitch 3 as in step 2. Lift up the needle. Pull the thread away from the needle and leave a tail of 3-inches. You can leave the tail there for now as you are still practicing.
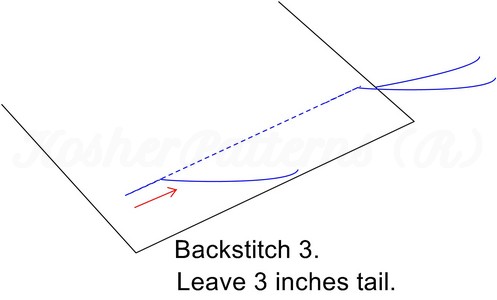
Straight Stitch Step 4 | Copyright Mrs Moriya C for KosherPatterns (R)
Repeat these steps 1-4 for each of the straight line in the template. There are 5 independent straight lines for you to sew.
Sew And Pivot
Next, you will learn how to sew and pivot while sewing a closed path. Pivot is the act of turning the cloth around the needle as the pivot point. This is usually done at an angle. In our case, it’s 90-degrees based on our template. Start with the first outer rectangle. The first horizontal line is similar to the previous straight lines.
Follow this guide for how to pivot. When you reach the corner, leave your needle down on the cloth. Lift up the presser foot. Rotate the cloth 90-degrees counter-clockwise.
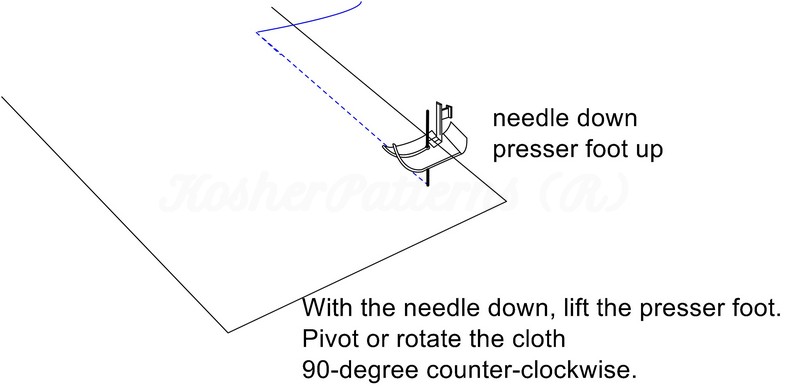
Sew & Pivot Step 1 | Copyright Mrs Moriya C for KosherPatterns (R)
Then, put down the presser foot and continue sewing the straight edge until your next corner.
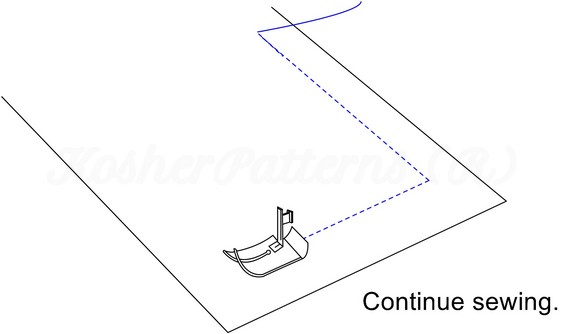
Sew & Pivot Step 2 | Copyright Mrs Moriya C for KosherPatterns (R)
Repeat the Sew & Pivot Steps 1 & 2 until you return to the starting point and complete the rectangle. Back-stitch 3 at this starting point and leave a trail of 3-inches of thread.
You can sew the inner rectangles (there are 2 of them) the same way.
If you are not satisfied with your first practice sewing, do not despair. Sewing is like riding a bicycle – the more you practice, the better you get.
Take another cloth and keep practicing. You will eventually get it to the point that you feel proud.
Here is another template you might like to try your sew-and-pivot technique, something you will be proud of as a Yehudis.
Sew and Pivot Template | Copyright Mrs Moriya C for KosherPatterns (R)